

How to Install and Configure an SMTP Plugin on WordPress
If you use WordPress and have a contact form on your website that sends emails, an SMTP plugin will significantly increase the delivery of your emails.
Follow these simple steps to install and configure an SMTP plugin on your WordPress website:
1. Log into your WordPress backend.
For instructions on how to log into your WordPress backend, please follow this guide here.
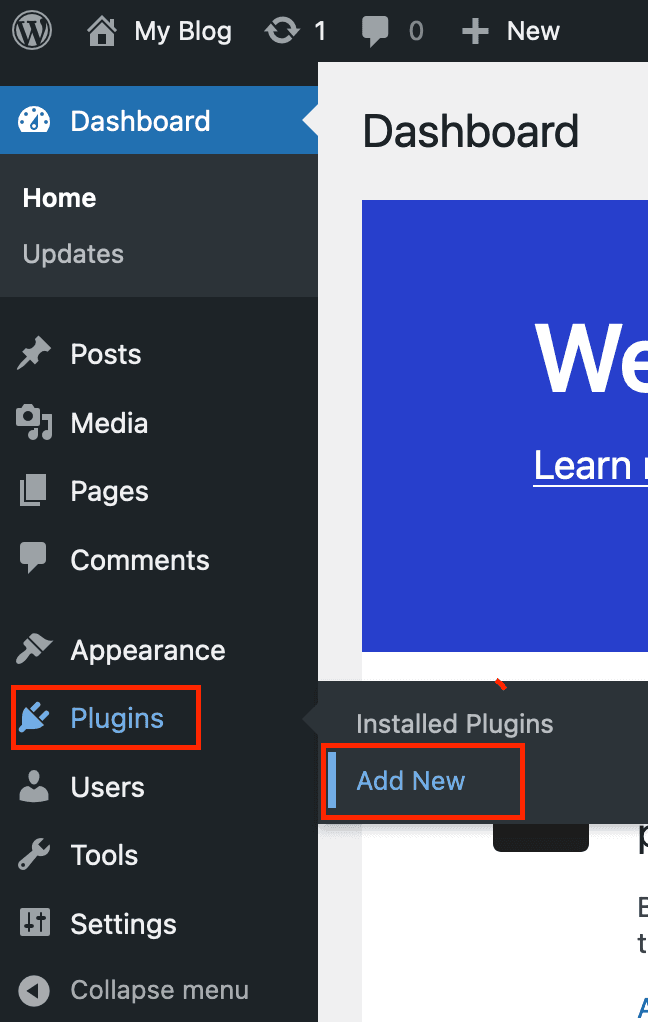
2. On the left-hand side panel, hover over Plugins, then click Add New.
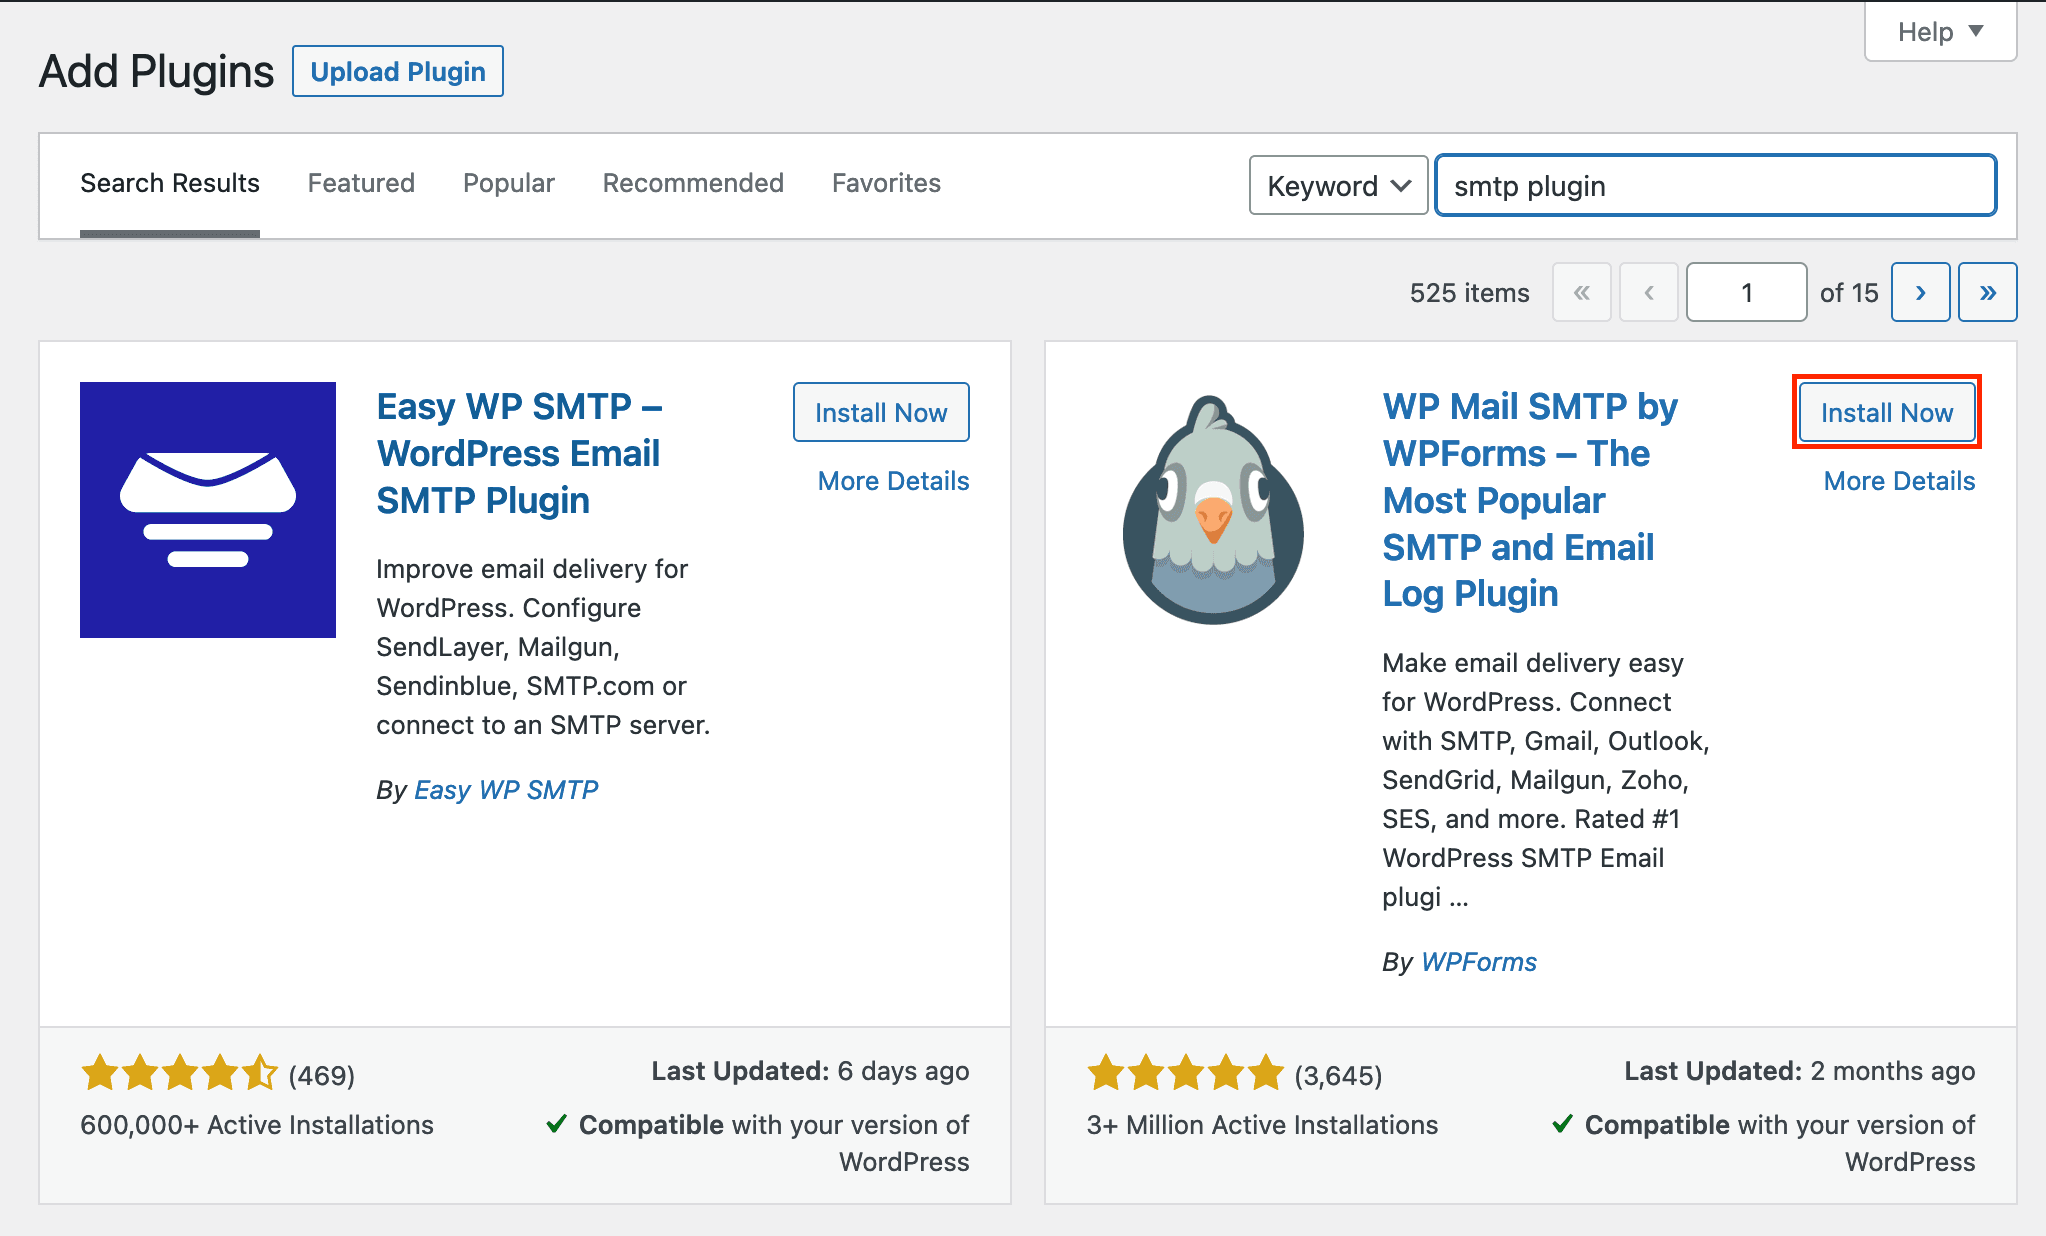
3. In the search bar, type in SMTP plugin.

4. Click the Install Now button for the plugin WP Mail SMTP by WPForms.
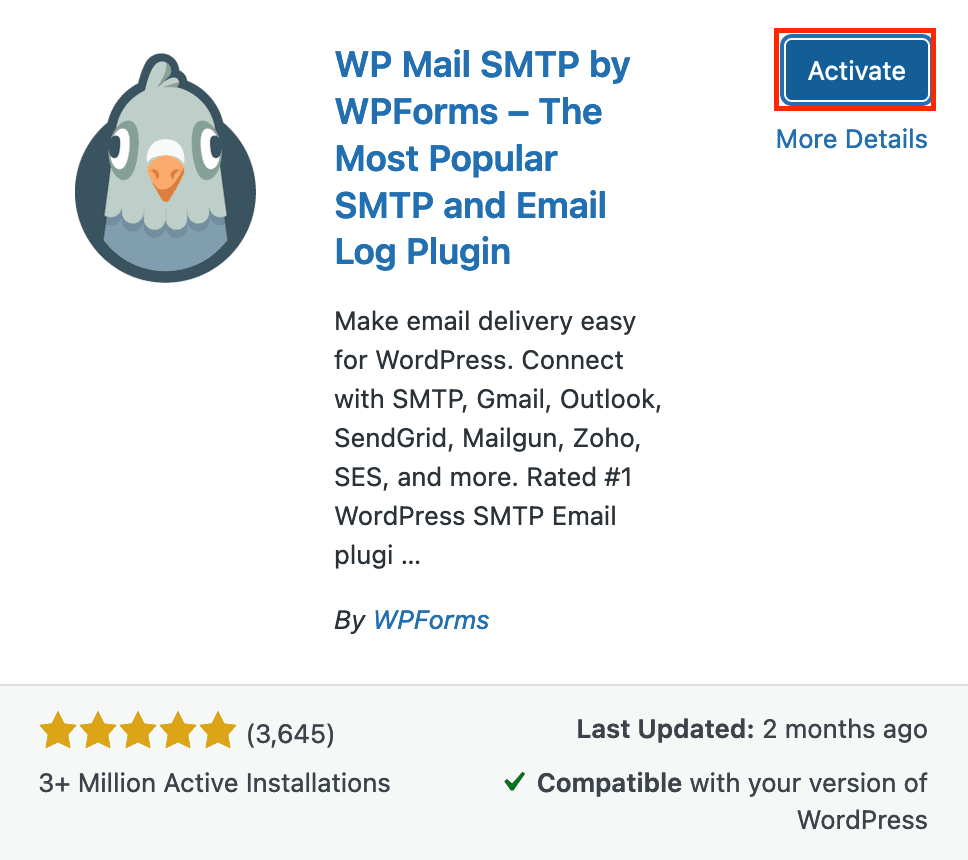
5. Once you have installed the plugin, click the Activate button.
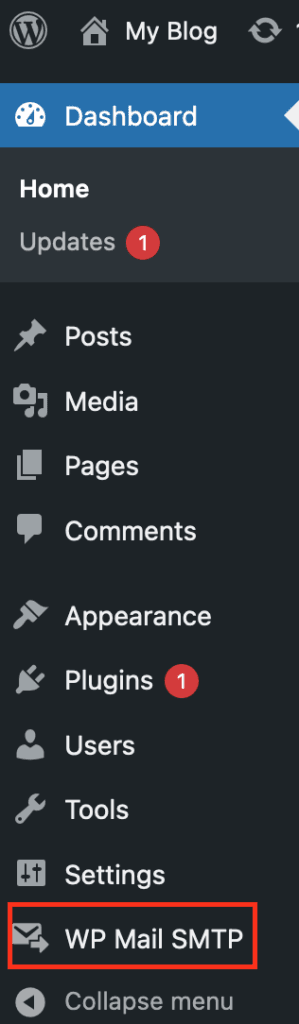
6. When the plugin is activated, go back to the left-hand side panel and click WP Mail SMTP.
7. Scroll down to the Mailer section and select Other SMTP.

8. Scroll down further to SMTP Hosts and complete the SMTP form.
Note: You would use that email account’s credentials and server settings.
If your email service runs through us, you can follow these guides to access these settings.
Click here for cPanel.
Click here for DirectAdmin.

SMTP Host – The hostname of your SMTP server.
Encryption – The encryption type you wish to use for sending emails.
SMTP Port – The port you will be using to send emails. (465 for SSL or 587 for TLS)
Auto TLS – The option to enable TLS by default if available.
Authentication – You should enable this setting for email authentication.
SMTP Username – The email address you are using to send emails.
SMTP Password – The password for the email address used.
9. When completed, scroll down further, then click the Save Settings button.

10. You will receive a confirmation when the settings are successfully saved.

Congratulations, you have installed and configured the SMTP plugin for your WordPress website!
Click here to view DreamIT Host’s WordPress Hosting plans.
Leave a comment
You must be logged in to post a comment.